CDL Pre-Trip Inspection Guide
The complete checklist, 7-step method, and key measurements for passing your CDL pre-trip inspection
CDL Answers Team
Written by CDL holders and exam prep experts · Updated April 2026

The CDL pre-trip inspection fails more test-takers than backing maneuvers or the road test. Most people who fail don't fail because they can't drive — they fail because they forgot to check one component or couldn't explain what they were looking for.
This guide gives you the complete CDL pre-trip inspection checklist used in actual CDL training programs, plus the exact verbal callout system that examiners expect to hear. You'll learn every component to inspect, the specific measurements you need to memorize, and the memory techniques that help drivers pass on their first attempt.
Whether you're preparing for a Class A, B, or C CDL skills test, everything you need is here — organized in the same walkaround sequence you'll follow on test day.
What Is the CDL Pre-Trip Inspection?
The CDL pre-trip inspection is a hands-on safety check that every commercial driver must perform before operating a commercial motor vehicle. It's required by federal law under FMCSA regulation 49 CFR §392.7, which states that a driver may not operate a vehicle unless they're "satisfied" that all parts and accessories are in good working order.
For new CDL applicants, the pre-trip inspection is tested as part of the CDL skills test. You'll stand in front of the vehicle with an examiner and walk around the entire truck, pointing to each component and verbally explaining what you're checking and what a defect would look like. This oral examination typically takes 30 to 45 minutes.
Two additional regulations matter. 49 CFR §396.13 requires drivers to review the previous driver's vehicle inspection report (DVIR) before driving. And 49 CFR §396.11 requires a written report at the end of each driving day covering brakes, steering, tires, lights, horn, wipers, mirrors, coupling devices, wheels, and emergency equipment.
The bottom line: the pre-trip inspection isn't optional. It's federal law, it's tested on the CDL exam, and it's the first thing you'll do every single day as a working driver.
Practice the same component and defect questions examiners ask during the CDL pre-trip oral exam.
Pre-Trip Inspection Practice QuestionsClass A vs. Class B vs. Class C: What's Different
The CDL pre-trip inspection varies by class because the vehicles are different. Here's what changes:
| Class A | Class B | Class C | |
|---|---|---|---|
| Vehicle type | Tractor-trailer (combination) | Straight truck, bus, dump truck | Passenger van (16+), HAZMAT vehicle |
| Test variations | 4 (engine start, in-cab, coupling, full vehicle) | 3 (engine start, in-cab, full vehicle) | 3 (engine start, in-cab, full vehicle) |
| Coupling system | Yes — fifth wheel, air lines, glad hands | No | No |
| Trailer inspection | Yes — landing gear, brakes, DOT tape, doors | No | No |
| Air brakes | Almost always | Usually | Sometimes |
| Total inspection items | ~95 | ~60 | ~40 |
The Class A CDL pre-trip inspection is the most extensive because you're inspecting both the tractor and the trailer, plus everything that connects them. If you're studying for a Class A, master the full inspection — Classes B and C are subsets of the same process.
The Complete Pre-Trip Inspection Checklist: 7-Step Method
The most reliable way to pass the CDL pre-trip inspection is to follow the same route around the truck every single time. This 7-step method mirrors what most CDL training programs teach and maps to the walkaround sequence examiners expect.
Approach and Overview
Walk toward the vehicle from the front. Check that it doesn't lean to one side (suspension, tire, or load problems). Look underneath for leaks — oil, coolant, fuel, or brake fluid. Scan for obvious body damage.
Engine Compartment
Open the hood or tilt the cab. Check every fluid, belt, hose, and major component with the engine OFF. This is where you'll spend the most time during the exam.
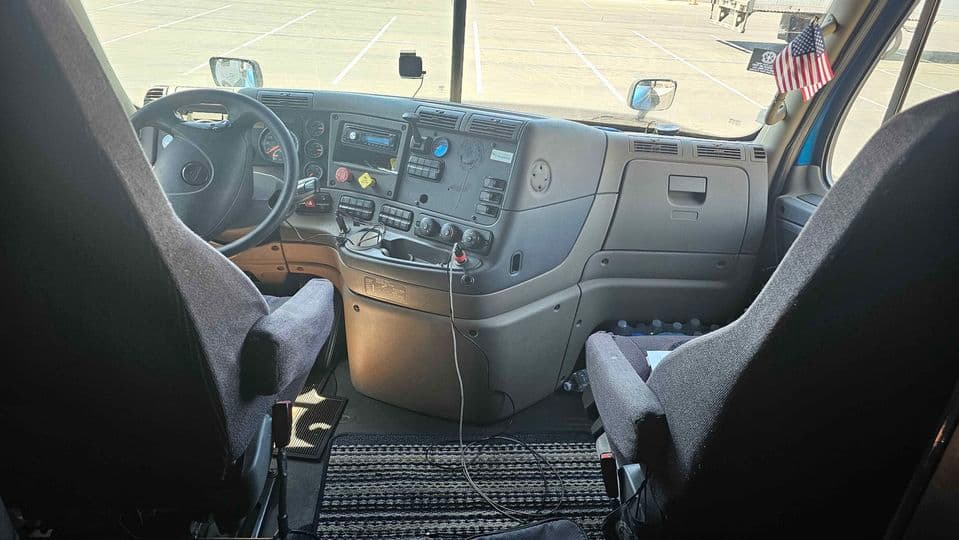
In-Cab Inspection
Start the engine. Check all gauges, controls, mirrors, windshield, safety equipment, and steering play. Test the parking brake and service brake.
Lights Check
Turn on headlights, four-way flashers, and marker lights. Walk the entire vehicle checking every light. Then test turn signals, high beams, brake lights, and reverse lights.
Driver-Side Walkaround
Starting from the front driver side, inspect tires, wheels, brakes, suspension, frame, fuel tank, exhaust, battery, door, and all exterior components.
Rear of Vehicle
Inspect the rear of the trailer (Class A) or the back of the truck. Check rear lights, reflectors, DOT tape, doors, ICC bumper, mud flaps, and cargo securement.
Passenger-Side Walkaround
Mirror your driver-side inspection on the passenger side, then return to the cab.
The key is consistency. Walk the same path, check the same components, say the same words — every time. When the examiner asks you to perform the pre-trip, you're running a routine you've practiced dozens of times, not trying to remember a random list.
Engine Compartment Checklist
The engine compartment inspection happens with the engine OFF. Take the ignition key with you — this ensures nobody starts the engine while you're working near moving parts.
Open the hood by standing to the driver side to avoid injury from the hood release. Check that the hood bracket and adjustable arm are properly mounted and secured (PMS).
Driver Side of Engine
- Valve cover — PMS, not damaged or leaking
- Oil cap and dipstick — Secured. To check: pull the dipstick, wipe it clean, reinsert, and verify the level is within the proper range
- Clutch reservoir — PMS, fluid filled to the proper level
- Alternator and wires — PMS, no cuts or damage to wiring
- AC compressor — PMS
- Power steering pump — PMS, hoses not leaking or damaged
- All three belt-driven components (alternator, AC compressor, power steering pump) — Each belt should have no more than 3/4 inch of deflection, with no cuts or splits
- Power steering reservoir — PMS. Check with the dipstick: pull it out, wipe, reinsert, verify fluid is at the proper level
- Steering shaft — PMS, check for excessive play. U-joints greased properly, no chafing
- Steering gear box — PMS, no leaking hoses
- Pitman arm, drag link, and tie rod — PMS, not bent, no missing castle nuts or cotter pins
- Wiper motor — PMS
- Air hoses and washer fluid cap — PMS
Passenger Side of Engine
- Air filter housing — Nothing stuck inside, hose PMS
- Turbocharger — PMS
- Radiator reservoir — PMS, no damage or leaks, fluid at proper level, cap secure, hoses undamaged
- Radiator, radiator support, shroud, and fan — PMS, no leaks, fan not broken
- Air compressor and water pump — PMS (both may be gear-driven rather than belt-driven)
- Fuel filter and hoses — PMS, not leaking
- Oil pan and oil filters — PMS, not leaking (there may be three oil filters)
Frame (Both Sides)
Frame rails PMS, not damaged, no illegal welds, no missing bolts.
Pro tip:When you verbally call out each component during the exam, use the phrase "properly mounted and secured." Examiners listen for it. Abbreviated as PMS in training materials, it's the foundation of every callout.
In-Cab Inspection Checklist
Enter the cab using three points of contact (two hands and one foot, or two feet and one hand). This is scored on the exam — climbing in carelessly can cost you points.
Before Starting the Engine
- Transmission — Verify it's in neutral (manual) or park (automatic)
- Parking brake — Set and holding
- Start the engine — Listen for unusual noises
Gauges and Instruments
- Oil pressure gauge — Should show normal reading almost immediately after start
- Engine temperature gauge — Will rise slowly and gradually (a sudden spike indicates a problem)
- Air pressure gauge — Verify pressure is building toward operating range (100-140 PSI)
- Voltmeter/ammeter — Confirms the alternator is charging properly
- Fuel gauge — Adequate fuel level
Controls and Safety Equipment
- Steering wheel play — Per 49 CFR §393.209, no more than 2-1/2 inches of play on a 20-inch wheel (manual steering) or 5-1/4 inches (power steering). Most commercial trucks have power steering
- Horn — Test that it works
- Windshield — PMS, clean and clear, no damage. Rubber seal runs 100% around
- Wiper blades — PMS, not damaged. Washer fluid operational
- Mirrors — PMS, clean and clear. Check all mirrors. No cracks or breaks
- Seat belt — Adjusted to correct length, latch operates smoothly
- Door seals — Run 100% around the door and window
- Window — Rolls up and down, no chips or cracks
- Grab handles — PMS
- Fire extinguisher — Fully charged (check gauge), properly mounted, accessible
- Three reflective triangles — PMS
- Spare electrical fuses — If vehicle uses fuses
Study the exact components and measurements examiners ask about during the pre-trip oral exam.
Pre-Trip Inspection Practice QuestionsLights Inspection Checklist
The lights check is one of the longest parts of the pre-trip inspection, and it's where many test-takers lose points by rushing. You need to verify every light on the vehicle.
Four-Way Flashers and Marker Lights
Turn on headlights and four-way flashers. Walk the entire vehicle in order:
- Front four-ways — PMS, proper color of amber. Headlights working.
- Tractor driver-side cab four-way — PMS and working
- Trailer driver-side top marker light — PMS and working
- Tractor rear four-ways — PMS and working
- Trailer driver-side marker light — PMS and working
- Trailer rear marker lights and four-ways — PMS and working
- License plate light — PMS and working
- Trailer passenger-side marker light — PMS and working
- Tractor rear four-ways (passenger side) — PMS and working
- Tractor passenger-side cab four-way — PMS and working
Turn Signals and High Beams
Return to the cab and activate the left turn signal. Walk the vehicle:
- Left turn signal working on front of tractor
- Left turn signal working on driver-side cab
- Left turn signal working on back of tractor
- Left turn signal working on rear of trailer
Switch to the right turn signal and verify at all four positions. Then check that high beam headlights are working on both sides of the tractor.
Brake, Reverse, and ABS Lights
These require assistance. Ask the examiner or an instructor to verify:
- Press the brake pedal — brake lights working on tractor and trailer (turn four-ways off first)
- Place shifter in reverse — reverse light working on back of tractor
- Roll the key on — ABS light on the driver-side rear of trailer flashes on and off
Coupling System Checklist (Class A Only)
The coupling system connects the tractor to the trailer. This section only applies to the Class A CDL pre-trip inspection — it's not tested for Class B or C.
Fifth Wheel
- Apron — PMS, no damage, no separation between the apron and the fifth wheel. No cracks or illegal welds
- Fifth wheel handle — Pulled in and the safety indicator is down (locked position)
- Fifth wheel mounting bolts — PMS
- Jaws — Wrapped around the shaft of the kingpin (not the head). Verify from underneath — no spacing between fifth wheel and apron
- Skid plate — Must be inspected for cracks, breaks, and kept lubricated
- Locking pins (if equipped) — Fully engaged, not loose or missing. There may be multiple pins.
Air and Electrical Connections
- Air hoses and glad hands — PMS at both cab and trailer ends. Remove the glad hands and verify the rubber seals on both the trailer and hose glad hands are intact. Check both sides.
- Electrical cord — PMS, no damage, no corrosion on pins. Flap works and has a spring. Check both sides.
- Bulkhead of trailer — No damage, all rivets secured
- Trailer annual inspection sticker — Current and up to date
Coupling and uncoupling procedures are tested on the Combination Vehicles written test. Practice the step-by-step sequence.
Combination Vehicles Practice TestExternal Walkaround Checklist
This is the longest section of the pre-trip inspection. You'll inspect everything on the outside of the vehicle, working front to back on the driver side, then back to front on the passenger side.
Tires and Wheels
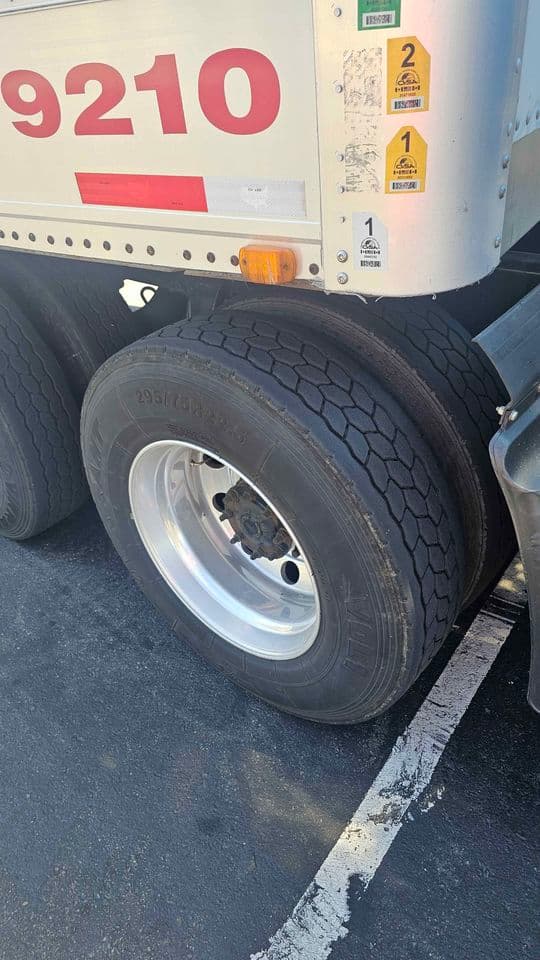
Check every tire on the vehicle:
- Sidewalls — Inner and outer sidewall free of cuts, abrasions, and gouges
- Tread depth — Steer tires: at least 4/32 inch (virgin radial only — no recaps). Drive and trailer tires: at least 2/32 inch (recaps allowed).
- Valve stems — PMS, with a safety cap. Use an air pressure gauge to check pressure
- Lug nuts — PMS, no missing or loose lugs. Look for chafing or rust trails (signs of looseness)
- Rims — PMS, no cracks, illegal welds, not bent
- Hub and hub seal — PMS, no missing bolts or leaks. If it has a sight glass, check the gear lube/hub oil level
- Budd spacing (dual wheels) — No debris between the duals, spacers centered
Brakes (At Every Axle)
- Brake chamber — PMS
- Push rod and slack adjuster — PMS. No more than 1 inch of play when pulled. Slack adjuster should sit at ~90 degrees to the brake chamber when applied
- Brake lining — PMS, more than 1/4 inch of material. No separation, cracks, oil, or grease
- Brake drum — PMS, no bluing (sign of overheating), no cracks, grease, or oil
- Air lines and ABS wire — PMS, no cuts or abrasions
Suspension (At Every Axle)
- Leaf springs — PMS, not cracked, broken, or shifted (scissoring)
- U-bolts — PMS, not broken, cracked, loose, or missing
- Leaf spring mounts — PMS
- Torque arm (trailer) — PMS
- Shock absorbers — Top and bottom mounts PMS. Shock not damaged and not leaking
Frame, Exhaust, and Fuel
- Frame rails — PMS, not damaged, no illegal welds, no missing bolts
- Drive shaft — PMS, nothing wrapped around the shaft
- U-joint — PMS, no chafing (indicates excessive wear)
- Muffler — All three brackets and the heat shield PMS. No black soot (indicates exhaust leak)
- Fuel tanks and steps — PMS, rubber strap goes all the way around and under. No leaks. Cap secure with safety chain and rubber seal
- Catwalk — PMS, securely fastened to tractor frame, no obstructions
Cab Exterior

- Door, handle, and hinges — PMS. Seal runs 100% around door and window. Door closes and latches properly
- Grab handles — PMS
- Battery and battery cover — PMS. Cables PMS with no corrosion. All cables run through a rubber grommet (no cable-to-metal contact)
- Federal annual tractor inspection sticker — Current and up to date
- Air tanks and airlines — All three air tanks PMS, not damaged
Trailer-Specific Items
- Landing gear — PMS, no rust, cracks, or bending. Legs even. Crank handle secured
- Crossmembers and flooring — PMS, no illegal welds, not cracked or broken
- DOT reflective tape — Runs at least 50% down the side of the trailer
- Placards — PMS on all four sides, clips attached
- Door cables — PMS, proper tension
- Trailer doors — Open to verify no damage inside. Close and verify it latches
- DOT tape at rear — Runs 100% across the bottom of the door and the ICC bumper
- Pintle hook — PMS, not damaged
- Rear glad hands — PMS, tethered, seals good
- Electrical socket — Pins intact, not corroded, flap operates spring-loaded
- Mud flaps — PMS
Air Brake Check Procedure
The air brake check is where the highest percentage of CDL pre-trip inspection failures happen. You need to know the exact pressure values and the correct sequence.
Build Air Pressure
With the engine running, let air pressure build. The governor should cut out (stop building) between 120 and 140 PSI (typically around 125 PSI).
Static Leakage Test
Engine off, brakes released. Watch the gauge for one minute. Pressure should not drop more than 2 PSI/min (single vehicle) or 3 PSI/min (combination).
Applied Leakage Test
Apply the service brake pedal fully and hold for one minute. Limits are slightly higher than static: no more than 3 PSI/min (single) or 4 PSI/min (combination).
Low Air Warning Test
Engine off, pump the brake pedal to reduce pressure. The low air warning buzzer or light must activate before pressure drops below 60 PSI.
Spring Brake Test
Keep pumping. The parking brake spring brakes should pop out (activate) between 20 and 45 PSI. This is your emergency backup if you lose all air pressure.
Parking Brake Test
Build pressure back up. Apply the parking brake and gently attempt to pull forward. The vehicle should not move.
Service Brake Test
Release the parking brake. Drive forward to about 5 MPH and apply the brake pedal. Brakes should stop the vehicle evenly with no pulling to one side.
Air brake questions make up a significant portion of the CDL written test. Practice cut-in/cut-out pressures and leakage rates.
Air Brakes Practice TestKey Measurements to Memorize
These specific numbers come up on both the written knowledge test and the pre-trip skills exam. Memorize all of them.
| Component | Specification |
|---|---|
| Steering wheel play (manual) | No more than 2½" on a 20" wheel |
| Steering wheel play (power) | No more than 5¼" on a 20" wheel |
| Steer tire tread depth | At least 4/32" (no recaps on steer axle per most training programs) |
| Drive/trailer tire tread | At least 2/32" (recaps allowed) |
| V-belt deflection | No more than 3/4" of play |
| Slack adjuster play | No more than ~1" when pulled |
| Brake lining thickness | More than 1/4" (air drum brakes, non-steering axle) |
| Governor cut-out | 120–140 PSI (typically ~125 PSI) |
| Governor cut-in | ~100 PSI (about 20-25 PSI below cut-out) |
| Low air warning | Must activate before 60 PSI |
| Spring brakes activate | 20–45 PSI |
| Static air leakage | ≤2 PSI/min (single), ≤3 PSI/min (combo) |
| Applied air leakage | ≤3 PSI/min (single), ≤4 PSI/min (combo) |
| DOT tape — sides | At least 50% of trailer length |
| DOT tape — rear | Full width across rear, including ICC bumper |
| Door/windshield seal | Must run 100% around |
What Examiners Look For and How Scoring Works
The CDL pre-trip inspection exam is scored differently than most people expect. It's not just about knowing the parts — it's about showing the examiner you know how to find problems.
The Three Things Examiners Score
- Identification— Can you name each component correctly? Saying "that brake thing" instead of "slack adjuster" costs points.
- Physical demonstration— You must point to or physically touch each component. Just glancing in the direction of a part doesn't count.
- Verbal explanation— Explain what you're checking AND what a defect would look like. Not "I'm checking the tire" — instead, "I'm checking the tire for at least 4/32 inch of tread depth on steer tires, no cuts, bulges, or exposed cords."
Automatic Failure Triggers
- Failing the air brake check procedure
- Missing a critical safety component in braking or steering
- Not using three points of contact when entering or exiting the cab
- Ignoring the examiner's directions
Failing any portion of the CDL skills test — pre-trip, basic vehicle control, or road test — means coming back at a later date. In many states, you must retake the entire skills test, though some states allow you to retake only the failed section. Check your state's DMV for specifics.
Most Common Pre-Trip Inspection Failures (and How to Avoid Them)
- Botching the air brake check — The single most common failure. Memorize the pressure values and practice the exact sequence until it's automatic.
- Forgetting to check underneath the vehicle — Many test-takers inspect what's at eye level and forget to look under the truck for leaks, frame damage, and exhaust issues.
- Not physically touching components — Pointing from two feet away doesn't count. Touch the slack adjuster. Grab the push rod. Put your hand on the brake drum (when cool).
- Vague verbal callouts — "It looks good" tells the examiner nothing. Use specific language: "Properly mounted and secured, no cracks, no illegal welds, not bent."
- Skipping the lights walkthrough — The full lights check takes 5-10 minutes. Rushing through it or skipping positions is an easy way to lose points.
- Forgetting safety equipment — Fire extinguisher, three reflective triangles, spare fuses. Simple to check, easy to forget under pressure.
- Wrong tread depth numbers — Saying 2/32 for steer tires instead of 4/32 is an instant red flag.
- Missing the ABS light check — Roll the key on and verify the ABS light on the trailer flashes on and off.
- Not checking glad hand seals — You need to physically remove the glad hands and inspect the rubber seals on both ends.
- Climbing into the cab incorrectly — Use three points of contact every time. No exceptions.
How to Remember the CDL Pre-Trip Inspection

A full Class A pre-trip inspection covers roughly 95 items. Nobody memorizes 95 random things. The drivers who pass on the first try use systems.
The "PMS" Callout System
Every component gets the same opening phrase: "properly mounted and secured." Starting every callout with PMS gives you a verbal anchor — it buys your brain time to remember what specific defects to mention for that component.
Example: "The brake drum is properly mounted and secured, no bluing, no cracks, no grease or oil."
Break It Into Zones
Don't memorize 95 items. Memorize 7 zones with 10-15 items each:
- Front of truck (10 items)
- Engine compartment — driver side (15 items)
- Engine compartment — passenger side (10 items)
- Driver-side walkaround (15 items)
- Coupling area (10 items)
- Under trailer (8 items)
- Rear of trailer and passenger-side walkaround (15 items)
Master one zone per day. By the end of the week, you know the whole truck.
Walk the Truck Daily
The single best study technique: go to a real truck and walk around it. Touch every part. Say the callouts out loud. Your hands and mouth will remember what your eyes read in a textbook.
Use Practice Questions to Reinforce
After you've walked the truck, test yourself with CDL pre-trip inspection practice questions. They reinforce component names, defect types, and the specific measurements you need to know cold.
For broader test-prep strategies, read our guide on how to pass the CDL test.
Practice Pre-Trip Inspection Questions
57 real CDL pre-trip inspection questions with detailed explanations. Every section of the walkaround is covered — engine compartment, in-cab, coupling, external inspection, lights, and air brake testing. Know every component before test day.
Study anywhere with the CDL Answers app — available on iOS and Android. Your progress syncs across all devices.